
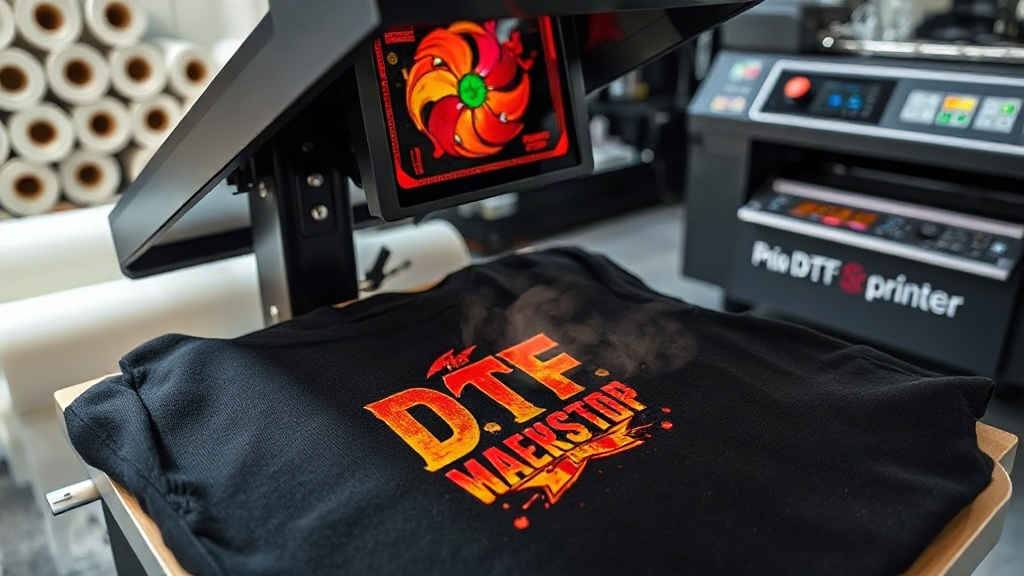
In the ever-evolving landscape of custom apparel printing, a revolutionary technology has taken center stage: DTF transfers. This method, which stands for Direct to Film, is transforming how businesses and hobbyists create vibrant, durable designs on a wide range of fabrics. If you have been searching for a flexible, cost-effective, and high-quality way to produce custom garments, understanding DTF transfers is your first step toward unlocking endless creative possibilities.
Whether you are a seasoned printer looking to expand your services or a small business owner wanting to create your own merchandise, this guide will walk you through everything from the basics to advanced tips. We will explore not only the technical process but also practical advice for achieving professional results. By the end, you will have a solid foundation to start experimenting and even master the art of DTF transfers.
What Are DTF Transfers?
At its core, DTF transfers involve printing your design onto a special PET film using a printer equipped with white ink. After printing, a powdered adhesive is applied to the wet ink, and the film is heated to cure both the ink and the adhesive. The result is a ready-to-press transfer that can be applied to almost any fabric using a heat press.
The beauty of this technique lies in its simplicity and versatility. Unlike traditional screen printing, which requires separate screens for each color and is best suited for large batches, DTF transfers allow for full-color, detailed prints with no minimum order quantities. You can create one-off designs or mass produce them with equal ease.
How DTF Transfers Work: Step-by-Step
To demystify the process, let’s break it down into clear steps. This will not only help you understand the mechanics but also appreciate the precision required.
Step 1: Design and Printing
First, you create or select your design using graphic design software. The design is then printed onto a special PET film using a DTF printer. Unlike regular inkjet printers, DTF printers use a specialized ink set that includes white ink. The white ink acts as a base layer, ensuring that your design remains vibrant even on dark fabrics.
Printing involves a mirror image of your final design because it will be transferred onto the fabric. The printer lays down the CMYK colors first, followed by a layer of white ink. This layering order is crucial for achieving opacity and color accuracy.
Step 2: Applying Adhesive Powder
Once the print is complete and still wet, a hot-melt adhesive powder is applied evenly over the entire design. The powder sticks to the wet ink, but it’s important to remove any excess. This is often done with a shaking device or by manually tapping off the excess powder. The powder is what will bond the transfer to the fabric during the pressing step.
Step 3: Curing
The film with the adhesive powder is then passed through a heat source, such as a curing oven or a heat press with a special attachment. This melts the adhesive powder, fusing it with the ink and creating a durable adhesive layer. The curing process also dries the ink, making the transfer ready for storage until you are ready to apply it.
Step 4: Pressing the Transfer
When you are ready to apply the transfer to a garment, you place the film with the design facing down onto the fabric. Using a heat press, you apply pressure and heat for a specific time, typically around 15 seconds at 320°F (160°C). The heat activates the adhesive, causing it to bond with the fabric fibers.
Step 5: Peeling
Finally, after the transfer cools slightly, you peel off the film, leaving the design firmly attached to the fabric. For best results, peel cold for matte finishes or hot for a glossy look, depending on the film type and your preference.
Why Choose DTF Transfers Over Other Methods?
What makes DTF transfers so appealing? Let’s compare them to other popular printing methods to highlight their unique advantages.
DTF vs. Screen Printing
Screen printing has long been the go-to for bulk orders due to its cost-effectiveness at scale. However, it has limitations: it requires separate screens for each color, making multi-color designs complex and expensive. There is also a high setup cost, so it’s impractical for single items. DTF transfers eliminate these barriers. You can print any design with unlimited colors at no extra cost, and there is no minimum order, making it perfect for personalized products, small batches, and even single items. The learning curve is also lower, as you don’t need to master screen preparation.
DTF vs. Direct-to-Garment (DTG) Printing
DTG printing is another digital method that prints directly onto the fabric. While DTG produces excellent results on cotton, it struggles with polyester blends and often requires pre-treatment. Additionally, DTG printers are expensive and require meticulous maintenance. DTF transfers offer greater flexibility because they can be applied to a wider range of materials, including cotton, polyester, nylon, and blends. They also produce a softer feel compared to traditional vinyl transfers.
DTF vs. Vinyl Cutting
Vinyl cutting is popular for making simple designs with solid colors, but it’s limited to cutouts and cannot reproduce detailed, multi-colored graphics. DTF transfers can handle intricate gradients, fine lines, and photographic images with ease. Moreover, vinyl transfers often have a stiff, plasticky feel, whereas DTF prints are softer and more breathable.
Essential Equipment and Materials for DTF Transfers
If you are considering venturing into DTF transfers, you’ll need the right tools. Here’s a breakdown of the essentials:
- DTF Printer: A printer specifically designed for DTF printing, usually based on an Epson or similar inkjet platform, modified to handle white ink and equipped with a roll-to-roll system for PET film.
- PET Film: A special film with a coating that accepts the ink and allows for easy peeling. It comes in various widths to suit different printer models.
- White Ink and CMYK Inks: DTF printers use pigment-based inks, with white ink being a critical component. The quality of the white ink affects opacity and washability.
- Hot-Melt Adhesive Powder: A fine powder that activates under heat to bond the design to fabric. It’s available in different particle sizes and formulations.
- Heat Press: A standard heat press is used for both curing the adhesive powder and applying the transfer to the garment. Some setups use a separate curing unit, but a heat press with a non-stick sheet works fine.
- Shaker or Powder Applicator: A device that applies the adhesive powder evenly and removes excess. You can start with a manual shaker, but for efficiency, consider an automatic powder shaker.
Choosing the Right DTF Printer
Investing in a good DTF printer is crucial. Consider factors like print width, speed, and the ability to handle white ink without clogging. Some popular models include the Epson SureColor series modified for DTF, as well as dedicated DTF printers from brands like Riicolort and Procolored. For beginners, a smaller printer may suffice, but if you plan to scale up, look for higher throughput.
Selecting PET Film and Adhesive Powder
Not all films and powders are created equal. The film must have the right coating to hold the ink and release smoothly. The adhesive powder should match the stretch and durability requirements of your garments. For example, stretch films and powders are ideal for sportswear. Always test different combinations to find what works best for your specific applications.
Tips for Perfect DTF Transfers
Even with the right equipment, achieving flawless prints requires some finesse. Here are practical tips drawn from hands-on experience:
- Calibrate Your Printer: Regularly run nozzle checks and clean your printheads to avoid banding or missing nozzles, which can ruin prints.
- Print on the Correct Side: Ensure you load the film with the printable side up. The printable side is usually identified by a slight tackiness or a mark on the film.
- Apply Powder Generously: You need enough powder to cover the entire design, but not so much that it clumps. After shaking, inspect the design to ensure there are no bare spots.
- Cure at the Right Temperature: Too low a temperature will leave the adhesive uncured, leading to poor adhesion. Too high can scorch the film. Follow the manufacturer’s guidelines, but also experiment to dial in the perfect settings.
- Press with Consistent Pressure: Uneven pressure can cause parts of the design to not adhere. Ensure your heat press is calibrated and use a pressing pillow for uneven areas like zippers or seams.
- Peel Technique: As mentioned, hot or cold peeling can affect the finish. Test both to see which gives the desired look and durability.
Creative Uses for DTF Transfers
The versatility of DTF transfers opens up a world of creative possibilities. Beyond the typical t-shirt, you can apply them to:
- Hoodies and sweatshirts
- Tote bags and backpacks
- Pillowcases and home textiles
- Aprons and workwear
- Sports jerseys and performance wear
- Canvas shoes and other accessories
Because they can be pre-printed and stored, you can also build an inventory of designs to sell at events or online, without committing to large production runs. This makes DTF transfers a fantastic model for print-on-demand businesses.
Troubleshooting Common DTF Transfer Issues
Even experienced printers encounter problems. Here are some common issues and how to solve them:
Problem: Design Cracks or Peels After Washing
This often results from inadequate adhesive powder or under-curing. Ensure you apply enough powder and that the curing temperature is within the recommended range. Also, advise customers to wash garments inside out in cold water.
Problem: Colors Look Washed Out
This could be due to low ink density or a faulty white ink layer. Check your print settings to ensure maximum ink saturation. Also, verify that the white ink is thoroughly mixed and not separated.
Problem: Film Sticks to the Fabric
If the film doesn’t peel off cleanly, it may be because the press temperature was too high, or you peeled before the adhesive cooled. For a hot peel, you need to peel immediately, but for cold peel, wait until it’s completely cool.
Problem: Poor Adhesion on Dark Fabrics
Dark fabrics require more opacity. Ensure you have a sufficient layer of white ink. You might need to increase the number of white ink layers in your printer settings.
Frequently Asked Questions About DTF Transfers
Can DTF transfers be applied to any fabric?
Yes, DTF transfers are incredibly versatile and can be applied to natural and synthetic fabrics, including cotton, polyester, and blends. They are especially great for materials that are difficult to print on with other methods, such as nylon or spandex. However, always test on a small area first to ensure compatibility.
How long do DTF transfers last?
With proper application and care, DTF transfers can withstand many washes without cracking or fading. The durability depends on the quality of materials and the pressing process. Typically, they can last as long as the garment itself if cared for correctly.
Do I need a special printer for DTF transfers?
Yes, you need a printer that can handle white ink and PET film. Many printers on the market are specifically designed for DTF, but you can also convert some inkjet printers with a DTF conversion kit. It's essential to invest in a reliable printer to avoid clogging issues with white ink.
What is the cost difference between DTF and screen printing for small orders?
For small orders, DTF transfers are significantly more cost-effective because there are no setup fees or screen costs. You can produce a single item for a similar cost per unit as a bulk order. Screen printing only becomes cheaper when you order hundreds of pieces.
Can I use DTF transfers on light and dark colored garments?
Absolutely. One of the major advantages of DTF transfers is their ability to print on both light and dark fabrics. The white ink base ensures that colors stay true and vibrant, regardless of the garment's color.
Conclusion: Your Next Step into DTF Printing
DTF transfers are more than just a trend; they are a reliable, efficient, and creative printing solution that empowers entrepreneurs and hobbyists alike. From their ease of use to their outstanding results, it's no wonder that this technology is becoming a staple in the custom printing industry. Whether you are looking to start a side hustle or elevate your existing business, embracing DTF transfers can open new avenues for growth.
Remember, the key to success lies in understanding the process, investing in quality materials, and honing your technique through practice. Don't be afraid to experiment with different fabrics, designs, and settings. With time, you'll be producing professional-grade prints that impress your customers and stand the test of time.
So, are you ready to dive into the world of DTF transfers? Gather your equipment, unleash your creativity, and start pressing. Your journey to mastering this exciting printing method begins now.